
本文分享如何使用图层样式功能制作一种漂亮的塑胶效果,把这种效果运用在文字特效的制作中,制作一款效果非常逼真的塑料特效。
最终效果如图所示。
1、首先在photoshop中创建一个新图层,大小设置为640*480,如图所示。你也可以使用你喜欢的尺寸。
2、按下D键重置前景色和背景色。然后填充图层为黑色,如图所示。
3、在工具样中选择横排文字工具,如图所示。
4、在属性栏中设置字体和大小,如图所示。本教程中我使用的是Helvetica Rounded、Black,如图所示。

5、设置前景色为白色,然后在图片中输入你喜欢的文字。由于后面我们会制作彩色的塑料文字,所以一开始使用白色会方便点。
6、在图层面板下方单击"添加图层样式"按钮。
7、在弹出的菜单中选择"颜色叠加"选项,设置颜色叠加样式,如图所示。
8、 打开图层样式对话框中的颜色叠加项后,单击"混合模式"右侧的小方块,如图所示。
9、在弹出的拾色器中任意选择一款你喜欢的颜色,在本教程中我选择了淡蓝色,如图所示。单击"确定"按钮。
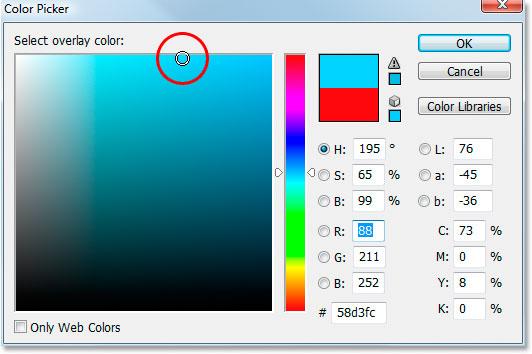
效果如图所示。

10、在图层样式对话框的左侧勾选"内发光",如图所示。
11、在图层样式对话框的右侧中设置:混合模式为叠加,不透明度为50%,颜色为#073d59,选择"边缘",大小为13px,如图所示

效果如图所示。

12、在图层样式对话框的左侧勾选"斜面和浮雕",如图所示。

13、在图层样式对话框的右侧中单击"光泽等高线"旁边的小三角,如图所示。
14、在弹出的快捷菜单中单击右侧的小三角,如图所示。
15、在弹出的菜单中选择"等高线"选项,如图所示。

16、此时会弹出一个提示窗口,意思是:是否用等高线.shc中的等高经替换当前的等高线。单击"追加"按钮,如图所示。
17、这时你会看到更新了多款等高线设置。在步骤14打开的菜单中选择"大列表"选项,如图所示。

18、现在打开等高线选择时,你会看到每款等高线图形的旁边都显示其对应的名称,现在我们选择一款名叫"环形-三环"的等高线,如图所示。
19、返回图层样式对话框,设置"斜面和浮雕"的参数。深度:131、大小:18、角度:120、高度:60、勾选"消除锯齿"、模式的不透明度100,阴影模式的不透明度0。如图所示。
效果如图所示。
20、在图层样式对话框的左侧勾选"等高线"选项,如图所示。
21、在右侧设置等高线,选择"平缓斜面-凹槽",如图所示。
然后设置范围为75%,如图所示。
效果如图所示。
22、按下Ctrl+J,复制文本图层,如图所示。
23、选择原来的文本图层,然后添加一个"描边"图层样式,如图所示。

24、在"描边"图层样式对话框中设置大小为6px,如图所示。
25、单击颜色小方块,打开"选取描边颜色"对话框,选择一种新的颜色,如图所示。
26、打开对拾色器后,把鼠标移动到图片中蓝色字母上,这时会出现一个吸管,单击一下选取字母的蓝色,如图所示。
27、选择斜面和浮雕,打开斜面和浮雕的参数设置界面,如图所示。
28、设置样式为"描边浮雕",并重新设置"光泽等高线"选择"平缓斜面-凹槽", 如图所示。

设置阴影模式的不透明度为40%,如图所示。
最后返回顶部设置深度为41%,然后拖动"大小"选项的滑块,直到你看到满意的效果为止。最终效果如图所示。